1. Introduction
We all know that data entered in the tables are persisted in the physical drive in the form of database files. Think about a table, say Customer (For any leading bank India), that has around 16 million records. When we try to retrieve records for two or three customers based on their customer id, all 16 million records are taken and comparison is made to get a match on the supplied customer ids. Think about how much time that will take if it is a web application and there are 25 to 30 customers that want to access their data through internet. Does the database server do 16 million x 30 searches? The answer is no because all modern databases use the concept of index.
2. What is an Index
Index is a database object, which can be created on one or more columns (16 Max column combination). When creating the index will read the column(s) and forms a relevant data structure to minimize the number of data comparisons. The index will improve the performance of data retrieval and adds some overhead on data modification such as create, delete and modify. So it depends on how much data retrieval can be performed on table versus how much of DML (Insert, Delete and Update) operations.
In this article, we will see creating the Index. The below two sections are taken from my previous article as it is required here. If your database has changes for the next two sections, you can directly go to section 5.
3. First Create Two Tables
To explain these constraints, we need two tables. First, let us create these tables. Run the below scripts to create the tables. Copy paste the code on the new Query Editor window, then execute it.
CREATE TABLE Student(StudId smallint, StudName varchar(50), Class tinyint);
CREATE TABLE TotalMarks(StudentId smallint, TotalMarks smallint);
Go
Note that there are no constraints at present on these tables. We will add the constraints one by one.
4. Primary Key Constraint
A table column with this constraint is called as the key column for the table. This constraint helps the table to make sure that the value is not repeated and also no null entries. We will mark the StudId column of the Student table as primary key. Follow these steps:
- Right click the
studenttable and click on the modify button. - From the displayed layout,
selecttheStudIdrow by clicking the Small Square like button on the left side of the row. - Click on the Set Primary Key toolbar button to set the
StudIdcolumn as primary key column.

Now this column does not allow null values and duplicate values. You can try inserting values to violate these conditions and see what happens. A table can have only one Primary key. Multiple columns can participate on the primary key column. Then, the uniqueness is considered among all the participant columns by combining their values.
5. Clustered Index
The primary key created for the StudId column will create a clustered index for the Studid column. A table can have only one clustered index on it.
When creating the clustered index, SQL server 2005 reads the Studid column and forms a Binary tree on it. This binary tree information is then stored separately in the disc. Expand the table Student and then expand the Indexes. You will see the following index created for you when the primary key is created:
With the use of the binary tree, now the search for the student based on the studid decreases the number of comparisons to a large amount. Let us assume that you had entered the following data in the table student:

The index will form the below specified binary tree. Note that for a given parent, there are only one or two Childs. The left side will always have a lesser value and the right side will always have a greater value when compared to parent. The tree can be constructed in the reverse way also. That is, left side higher and right side lower.

Now let us assume that we had written a query like below:
Select * from student where studid = 103;
Select * from student where studid = 107;
Execution without index will return value for the first query after third comparison.
Execution without index will return value for the second query at eights comparison.
Execution of first query with index will return value at first comparison.
Execution of second query with index will return the value at the third comparison. Look below:
- Compare 107 vs 103 : Move to right node
- Compare 107 vs 106 : Move to right node
- Compare 107 vs 107 : Matched, return the record
If numbers of records are less, you cannot see a different one. Now apply this technique with a Yahoo email user accounts stored in a table called say YahooLogin. Let us assume there are 33 million users around the world that have Yahoo email id and that is stored in the YahooLogin. When a user logs in by giving the user name and password, the comparison required is 1 to 25, with the binary tree that is clustered index.
Look at the above picture and guess yourself how fast you will reach into the level 25. Without Clustered index, the comparison required is 1 to 33 millions.
The above explanation is for easy understanding. Now a days SQL server is using the B-Tree techniques to represent the clustered index.
Got the usage of Clustered index? Let us move to Non-Clustered index.
6. Non Clustered Index
A non-clustered index is useful for columns that have some repeated values. Say for example, AccountType column of a bank database may have 10 million rows. But, the distinct values of account type may be 10-15. A clustered index is automatically created when we create the primary key for the table. We need to take care of the creation of the non-clustered index.
Follow the steps below to create a Non-clustered index on our table Student based on the column class.
- After expanding the
Studenttable, right click on theIndexes. And click on the New Index.
- From the displayed dialog, type the index name as shown below and then click on the Add button to select the column(s) that participate in the index. Make sure the
Indextype is Non-Clustered.
- In the select column dialog, place a check mark for the column class. This tells that we need a non-clustered index for the column
Student.Class. You can also combine more than one column to create theIndex. Once the column is selected, click on the OK button. You will return the dialog shown above with the selected column marked in blue. Our index has only one column. If you selected more than one column, using theMoveUpandMoveDownbutton, you can change order of the indexed columns. When you are using the combination of columns, always use the highly repeated column first and more unique columns down in the list. For example, let use assume the correct order for creating the Non-clustered index is:Class,DateOfBirth,PlaceOfBirth.
- Click on the Index folder on the right side and you will see the non-clustered index based on the column class is created for you.

7. How Does a Non-Clustered Index Work?
A table can have more than one Non-Clustered index. But, it should have only one clustered index that works based on the Binary tree concept. Non-Clustered column always depends on the Clustered column on the database.
This can be easily explained with the concept of a book and its index page at the end. Let us assume that you are going to a bookshop and found a big 1500 pages of C# book that says all about C#. When you glanced at the book, it has all beautiful color pages and shiny papers. But, that is not only the eligibility for a good book right? One you are impressed, you want to see your favorite topic of Regular Expressions and how it is explained in the book. What will you do? I just peeped at you from behind and recorded what you did as below:
- You went to the Index page (it has total 25 pages). It is already sorted and hence you easily picked up Regular Expression that comes on page Number 17.
- Next, you noted down the number displayed next to it which is 407, 816, 1200-1220.
- Your first target is Page 407. You opened a page in the middle, the page is greater than 500.
- Then you moved to a somewhat lower page. But it still reads 310.
- Then you moved to a higher page. You are very lucky you exactly got page 407. [Yes man you got it. Otherwise I need to write more. OK?]
- That’s all, you started exploring what is written about Regular expression on that page, keeping in mind that you need to find page 816 also.
In the above scenario, the Index page is Non-Clustered index and the page numbers are clustered index arranged in a binary tree. See how you came to the page 407 very quickly. Your mind actually traversed the binary tree way left and right to reach the page 407 quickly.
Here, the class column with distinct values 1,2,3..12 will store the clustered index columns value along with it. Say for example; Let us take only class value of 1. The Index goes like this:
1: 100, 104, 105
So here, you can easily get all the records that have value for class = 1. Map this with the Book index example now. See you all in the next article.
History
- 26th March, 2011: Initial post
Differences between a Stored Procedure and a Trigger
- We can execute a stored procedure whenever we want with the help of the
execcommand, but a trigger can only be executed whenever an event (insert, delete, and update) is fired on the table on which the trigger is defined. - We can call a stored procedure from inside another stored procedure but we can't directly call another trigger within a trigger. We can only achieve nesting of triggers in which the action (insert, delete, and update) defined within a trigger can initiate execution of another trigger defined on the same table or a different table.
- Stored procedures can be scheduled through a job to execute on a predefined time, but we can't schedule a trigger.
- Stored procedure can take input parameters, but we can't pass parameters as input to a trigger.
- Stored procedures can return values but a trigger cannot return a value.
- We can use Print commands inside a stored procedure for debugging purposes but we can't use print commands inside a trigger.
- We can use transaction statements like begin transaction, commit transaction, and rollback inside a stored procedure but we can't use transaction statements inside a trigger.
- We can call a stored procedure from the front end (.asp files, .aspx files, .ascx files, etc.) but we can't call a trigger from these files.
- Stored procedures are used for performing tasks. Stored procedures are normally used for performing user specified tasks. They can have parameters and return multiple results sets.
- The Triggers for auditing work: Triggers normally are used for auditing work. They can be used to trace the activities of table events.
| Business Intelligence Development Studio (BIDS) (BIDS) |
| Creating projects and solutions with SSIS (Projects and Solutions) |
OverviewThe BIDS paradigm for developing SSIS packages is based on the concept of projects and solutions. A project is a container for one or more SSIS packages. Projects can be used to organize SSIS packages in a meaningful way. For instance if I have a number of SSIS packages that are used to load a data warehouse from a particular source system, I might create an SSIS project for all SSIS packages that are used in the ETL process for that source system. I might create other SSIS projects for the various other source systems that are used to populate the data warehouse.
A solution is a container for one or more projects. When you create multiple SSIS projects to organize your packages, you combine those packages into one or more solutions. Continuing with my example above, if I have several SSIS projects that each represent a source system used to populate a data warehouse, I might create a single solution to hold all of these related SSIS projects. In this section we will walk through creating a project and a solution with BIDS, adding a new project to our solution, and adding an existing SSIS package to a project.
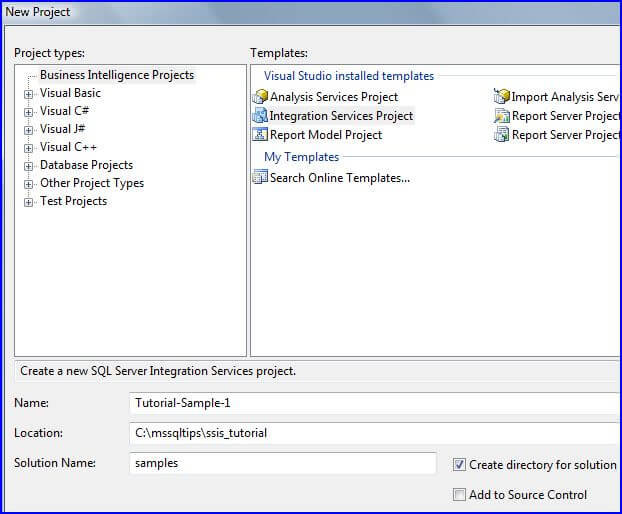
ExplanationTo begin launch BIDS by selecting SQL Server Business Intelligence Development Studio from the Microsoft SQL Server program group. Click File, New, Project on the top level menu to display the New Project dialog. Select Business Intelligence Projects as the project type, then Integration Services Project as the template; fill in the dialog as shown below:
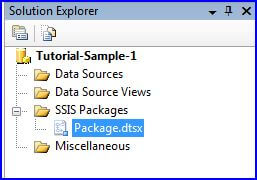
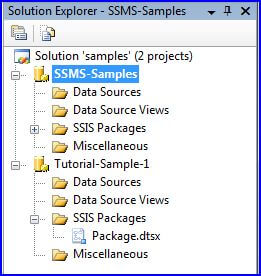
Returning to BIDS you will now see the following in the Solution Explorer which is located in the top right corner of the window:
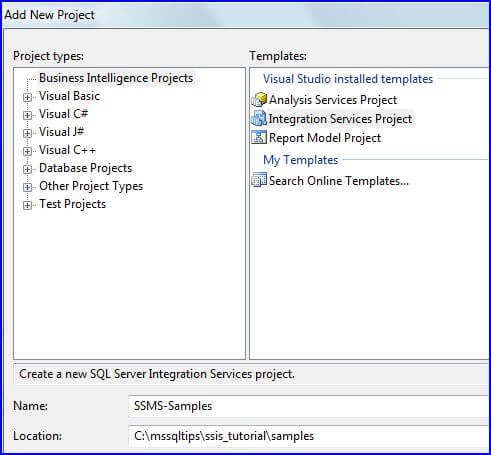
Now that we have successfully created a new project and a solution, let's add another new project to this solution. Click the top level File menu in BIDS then Add, New Project and fill in the Add New Project dialog as shown below:
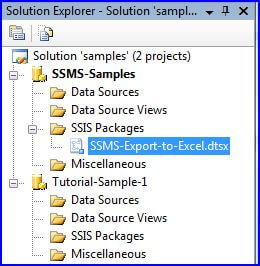
Now when we look at the Solution Explorer in BIDS we see the following:
| Overview of projects and solutions in SSIS |
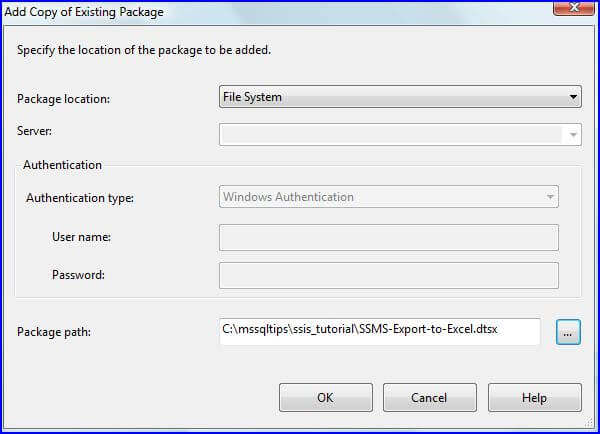
OverviewAn SSIS package is similar to a program that performs some specific task. As an example of something we might do with an SSIS package, I would like to copy the contents of a table in the AdventureWorksDW database to an Excel spreadsheet. We initially did this using the Export Wizard task in SSMS and saved our work as an SSIS package. We will review that SSIS package as a way to get an understanding of an SSIS package.
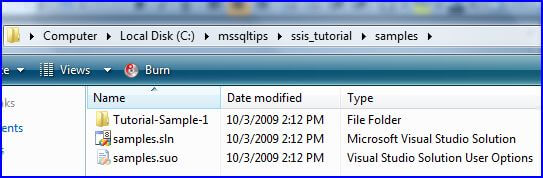
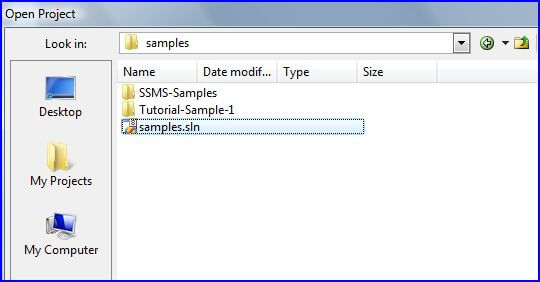
ExplanationTo begin launch BIDS by selecting SQL Server Business Intelligence Development Studio from the Microsoft SQL Server program group. Click File, Open, Project / Solution on the top level menu to display the Open Project dialog. Navigate to the location of the solution as shown below then click Open:
- Designer
- Connection Managers
- Toolbox
- Properties Window
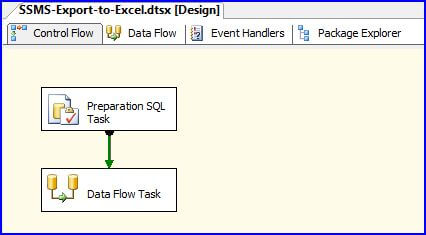
- The Control Flow tab (shown above) contains the tasks that the SSIS package performs and the flow from one task to another.
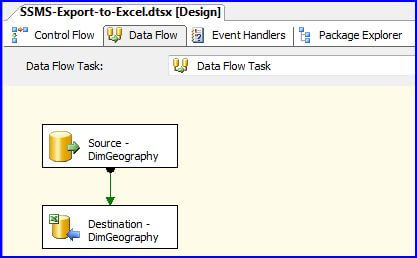
- The Data Flow tab (shown below) is another designer that contains the details for a given data flow task; e.g. retrieve data from some data source, optionally perform some transformations on the data, then write it to some other data source.
- The Event Handlers tab is yet another designer where we can specify tasks to be performed when a particular event is raised.
- The Package Explorer tab represents the entire package in a tree-view.

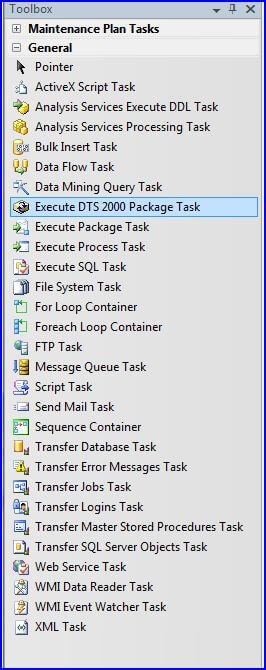
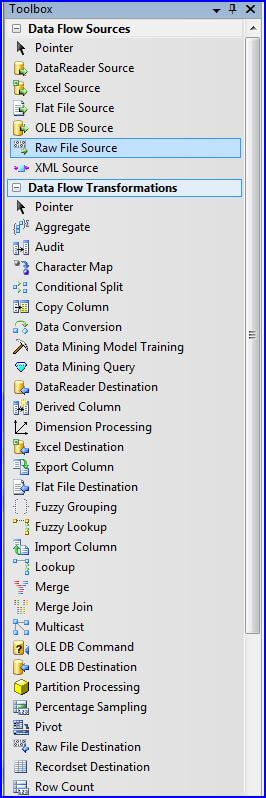
The Toolbox contains the tasks that are available to the Control Flow, Data Flow or Event Handlers designers. To build a package you simply drag tasks from the Toolbox onto the designer and connect them in the order you want to execute. The following Toolbox tasks are available in the Control Flow designer tab:
| Creating a Simple SSIS Package |
Overview
In this section we will walk through creating a simple SSIS package from scratch. As an example we will generate an Excel spreadsheet that can be used to manually enter a sales forecast by city and state. The city and state information will be extracted from the AdventureWorksDW database and output to an Excel spreadsheet. The sales department could use this spreadsheet to enter the forecast. Another SSIS package will import the data from the spreadsheet and update a table in the AdventureWorksDW database.
In the sections that follow we will walk through the following steps:
- Create a new SSIS package and discuss some of the package properties
- Add Connection Managers for our data source and destination
- Add tasks to the package Control Flow
- Add tasks to the package Data Flow
- Execute the package in BIDS
For information : http://www.mssqltips.com/sqlservertutorial/208/create-a-new-ssis-package/